
MAKE YOUR PLANT-BASED CHEESE!
Okay, so you got your plant-based charcuterie kit, and now it's time to have some fun in the kitchen!
You can make your vegan cheese recipe in five minutes or less :) start your timers, shall we?
*For the Best Outcome, Please Read Instructions in Their Entirety Prior to Making the Recipe!*
Ingredients Needed:
- DIY Kit contents
- 1.5 cups of fluid (plant milk, blended white beans and water, reduced broth, wine or beer, etc.)
- 2 tablespoons of oil - ideally Refined Coconut Oil, but any will do. Any flavor in the oil will influence the flavor of the cheese.
- 1 teaspoon to 1 tablespoon of lemon or lime juice, depending on how tangy and “sharp” you want the cheeses.
- ¼ cup to ½ cup of any additional ingredients you would like if you plan to craft your own personalized signature flavor, such as adding fresh herbs,
- roasted garlic, caramelized onions, sauteed mushrooms, sun dried tomato, etc.
Instructions:
- Add 2 tablespoons of Coconut Oil into a pan and put it on the lowest setting to dissolve.
- Add 1.5 cups of desired fluid and the contents of the DIY Kit into a blender and blend on low for 60 seconds.
- Pour the contents of the blender into the pan and raise the heat to medium/medium-high. You are going to heat for 2-3 minutes, stirring constantly…
- As it thickens, give it a taste and add more salt and any other dry seasonings. Consider 1 teaspoon of Cumin, Rosemary, Oregano, etc.
- Should you see lumps, they will work out as you continue the cooking.
- Be careful not to heat it too quickly or the oil will pull away and you will need to put it back into the blender to re-combine. Then return to the stove and re-heat.
- Keep stirring for about 2-3 minutes until the batter thickens. Drop a dollop the size of a pine nut on to a plate or the counter and let it set up for a moment. If you can push the dollop and it slides and you can pick it up without it smooshing it is done.
- Turn heat down to the lowest setting and as an option to craft a signature cheese add any special ingredients such as fresh herbs, garlic, onions, etc. and stir to incorporate. Keep stirring to combine.
- Add 1 teaspoon to 1 tablespoon of lemon or lime juice and stir to incorporate.
- Pour the contents into a glass, silicon or heat-resistant plastic container and let it set up on the counter for about an hour and store in the fridge as you would conventional cheese.

Chef’s Notes:
- If you use a low fat plant milk (thinner consistency), the finished cheese will be firmer and super melty and gooey cheese.
- If you use homemade cashew cream or an unflavored and unsweetened plant yogurt (thicker consistency), you will make great cold cheese for crackers and cold sandwiches.
- This cheese will freeze without any compromise to taste or texture and ought to be stored as you would any dairy cheese.
Voila! Who's ready to dive in?

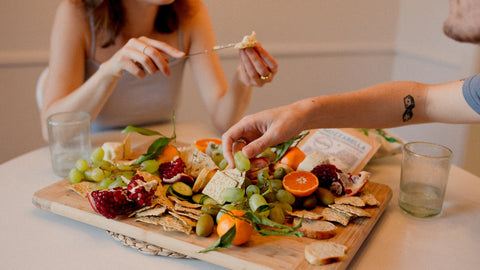
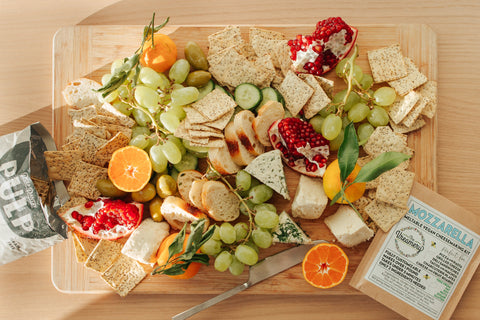
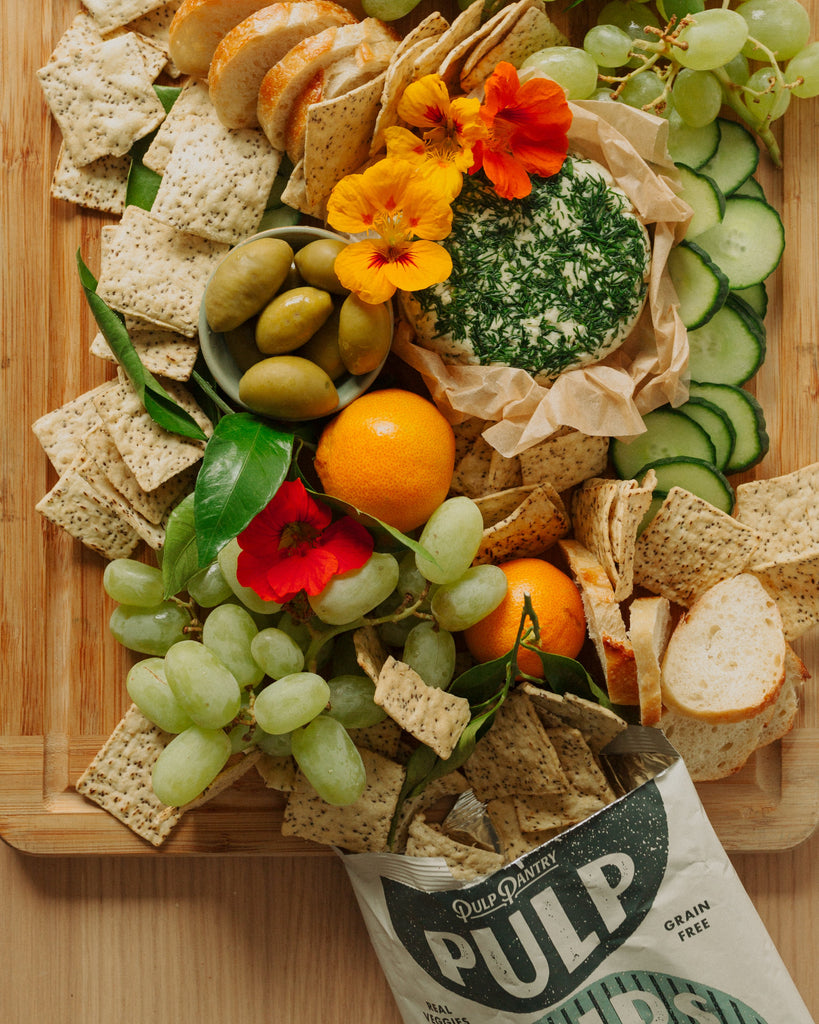
Best Tips for Building a Charcuterie Board:
How to build your gorgeous charcuterie board display? It's time to get creative!
Our recipe editor @aleighmichelle has some tips for your hosting during this busy holiday season! Whether hosting friends, family, or treating yourself, there’s no better way to feast with your eyes, and mouths, than creating a charcuterie board with your own creative spin.
Process:
To put the board together, put together a balance of veggies and fruits - buy local and in season!
For fall / winter, consider selecting from these options if you’re on the west coast:
- Carrot
- Celery
- Clementines
- Endive
- Escarole
- Kiwi
- Kumquat
- Persimmons
- Oranges
- Turnips
Make sure to include two vessels for the cheese (such as Pulp Chips and bread!).
Add a salty bite of some sort like olives or caper berries.
Follow these simple video instructions for the full run down, and to watch our recipe editor Aleigh build her board: